tech.guitarrapc.cóm

Technical updates

pwshで予測機能を選択する

PowerShell 7.1にはPSReadLine 2.1が搭載されています。PSReadLineはこのバージョンから予測機能をサポートしており、シェルで次に入力する内容を予測してグレイアウト表示します。 こういうグレイアウトされたプレースホルダー表示、見たことないでしょうか?

予測候補の表示例

今回はこのメモです。

予測候補を選択する

予測機能が出ていてもTabキーを押しても現在ディレクトリのファイルが候補に出るだけで「予測候補を選べません」、なんだと。 このため、予測候補度を選びたいなーと思いつつなぞるように入力するとかいう雑なことをしていました。

予測候補に沿って入力している

予測候補を選択するには「右矢印キー」を押してください。

予測候補を選択する

以上、この記事を書いた動機でした。

予測候補の詳細

Microsoft Learnにいい感じの記事があるので、これを見ると良いでしょう。

予測候補は仮想ターミナル(VT)がサポートされいて、PowerShell 7.2以降ならデフォルト有効です。VTは、Windows TerminalやVS Codeのターミナル、WSL、macOSのターミナルアプリなどでサポートされています。 ということで、Windows 11 25H2以降であれば、PowerShell 7.4をインストールしたらすぐに使えます。

もしも予測候補が出ない場合は、以下のコマンドで予測機能が有効になっているか確認してください。

Get-PSReadLineOption | Select-Object -Property PredictionSource

また、もしインストールされていない場合、次のコマンドで最新のPSReadLineをインストールしてください。

Install-PSResource -Name PSReadLine

色やキーバインド変更も可能ですが、私はデフォルトのまま使っているので詳細はMicrosoft Learnで。

まとめ

候補はTabキーで選ぶというのがシェルの常識だと思い込んでいていました。まさか右矢印キーなんですね。

参考資料

External Secrets OperatorからAWS Secrets Store CSI Driver providerに切り替える

先日、EKS AddonにAWS Secrets Store CSI Driver providerを追加したというアナウンスがありました。これにより、Kubernetesで外部シークレット管理サービスを利用する方法として、External Secrets Operator(ESO)からSecrets Store CSI Driverへ切り替える選択肢が現実的になりました。

今回は、ESOの現状を踏まえつつ、AWS Secrets Store CSI Driver providerでのシークレット管理方法についてみていきます。

Kubernetesにおけるシークレット管理の背景

Kubernetesにおいて、どうしよう...となりやすいのがシークレットです。Kubernetes SecretsはただのBase64エンコードされた平文データなため、KubernetesマニフェストとしてGitリポジトリに保存するのは現代のポリシー的には受け入れられません。かといってシークレットをKMSや公開鍵で暗号化してGitに保存すると、機密情報のアップデートや利用がとても煩雑になります。使いやすさとセキュリティのバランスを取るのが難しいわけです。

そこで、ここ数年はクラウドの機密情報ストア(AWS Secrets Manager, Azure Key Vaultなど)にデータを保持しておき、Kubernetesはそれを読み取ってKubernetes SecretsやPodにマウントする手法が広く利用されています。この方法なら、Gitやコンテナに直接シークレットを含めることなく安全にPodで参照しつつ、シークレットの運用もシンプルです。機密情報ストアをKubernetesから利用する方法としては、コミュニティが提供するExternal Secrets Operator(ESO)と、Kubernetes公式のSecrets Store CSI Driverの実装があります。

External Secrets Operatorとは

External Secrets Operatorは、機密情報ストアからシークレットを取得しKubernetes Secretsへ同期/提供するオープンソースのコントローラーです。ESOはクラウドを含む複数のシークレット管理サービスに対応しており、柔軟な認証方式をサポートしています。また、ESO以前に使われていた同様の機能を提供していたコントローラーKubernetes External Secretsから移行先として提示されたこともあり、現在も広く利用されています。

そんなESOですが、2025年、プロジェクトの利用者に対してコア開発者の少なさが課題となっていることがアナウンスされています。いわゆるOSSで食っていけない状況が続いています。

ESOの状況に対して私個人としてできるのはコントリビュートやスポンサーですが、他方でリリースが止まった状況を踏まえると今後の代替手段を探す必要もあります。

Secrets Store CSI Driverとは

Secrets Store CSI Driverの前にCSIについて簡単に説明します。KubernetesのContainer Storage Interface(CSI) Driverは、永続ストレージ(ブロックデバイスやファイルストレージ)をプラグイン方式で追加できるようにする仕組みです。実装例としてAWS EBS CSI DriverAzure Disk CSI DriverGoogle Compute Engine Persistent Disk CSI Driverなどがありストレージ(PV/PVC)を提供します。

一方で、Secrets Store CSI Driverはストレージではなく外部の機密情報ストアに保存された機密情報をCSIボリューム2としてPodにマウントするためのドライバーです。AWSが公式に提供するAWS Secrets Store CSI Driver provider(AWS Secrets and Configuration Provider、ASCPとも呼ばれる)はその実装例の1つで、AWS Secrets ManagerやAWS Systems Manager Parameter Storeに保存されているシークレットをPod内のファイルとしてマウントしたり、オプションでKubernetes Secretへ同期できます。

AWS Secrets Store CSI Driver provider(以降ASCP)はESOと同じような使い方ができますが、AWS公式実装にもかかわらずEKSへの導入にHelm Chartを使う必要があり、あまり機能が変わらないことから、ESOを使っているなら移行するほどの動機付けもありませんでした。しかし今回、EKS AddonにASCPが加わったことで、導入や運用が以前より簡単になりました。何よりESOのメンテナンス問題を考えると、AWS公式がメンテナンスしている点は魅力的です。ここにきて、ESOの代替手段として十分に検討できるようになりました。

EKS AddonでAWS Secrets Store CSI Driver providerをインストール

ASCPは、AWS提供のEKS Addonとして導入できます。EKS Addonを利用することで、Helm Chartやマニフェストを手動で適用する必要がなくなり、AWS Management ConsoleやAWS CLI、IaCから簡単に導入できます。AWS提供のEKS Addonなので、EKSクラスターのバージョンアップに合わせて速やかにバージョンアップが提供される点もメリットです。3

EKS Addonのインストール

EKS Addonとして導入する場合、以下のコマンドでAddonをインストールします。どの方法もHelmチャートを使ってインストールするより圧倒的に簡単です。カスタム設定したい値が、syncSecret.enabled: bool程度しかないので現実的にありって感じです。

eksctl create addon --cluster $CLUSTER_NAME --name aws-secrets-store-csi-driver-provider

あるいは、IaCなら次のように設定します。TerraformとPulumi C#の例を示します。

# terraform
resource "aws_eks_addon" "aws_secrets_store_csi_driver_provider" {
  cluster_name                = aws_eks_cluster.example.name
  addon_name                  = "aws-secrets-store-csi-driver-provider"
  addon_version               = "v2.1.1-eksbuild.1"
  resolve_conflicts_on_update = "OVERWRITE",
  resolve_conflicts_on_create = "OVERWRITE",
  configuration_values        = jsonencode({
    "secrets-store-csi-driver" = {
      "syncSecret" = {
        "enabled" = true
      }
    }
  })
}
// Pulumi C#
new Addon($"{name}-aws-secrets-store-csi-driver-provider", new()
{
    AddonName = "aws-secrets-store-csi-driver-provider",
    AddonVersion = "v2.1.1-eksbuild.1",
    ClusterName = cluster.Name,
    ResolveConflictsOnCreate = "OVERWRITE",
    ResolveConflictsOnUpdate = "OVERWRITE",
    ConfigurationValues = """
    {
        "secrets-store-csi-driver": {
            "syncSecret": {
                "enabled": true
            }
        }
    }
    """.Minify(),
});

static string Minify(this string value) => value
    .Replace("\r\n", "\n")
    .Replace("\n", "")
    .Replace("\t", "")
    .Replace(" ", "");

利用できるEKS Addonバージョンは、次のコマンドで確認できます。

aws eks describe-addon-versions --kubernetes-version 1.34 --addon-name aws-secrets-store-csi-driver-provider | jq ".addons[].addonVersions[] | {addonVersion: .addonVersion, clusterVersion: .compatibilities[0].clusterVersion }"

Pod Identityの用意

ESOはESO ControllerでAWS認証しましたが、ASCPは利用するアプリケーションPodのService AccountでAWS認証します。Podごとに異なる権限を与えられるので、より細かい権限管理が可能です。認証方式は、Pod IdentityとIRSAの2つから選べます。Pod Identityはnamespaceが固定できる場合に適しており、IRSAはB/Gデプロイなどでnamespaceが変動する場合に向いています。今回は簡単のためにPod Identityを利用する例を示します。

Pod Identityを利用する場合、EKS Pod Identityを設定し、AssumeRoleポリシーは次のように設定します。

{
    "Version":"2012-10-17",
    "Statement": [
      {
        "Effect": "Allow",
        "Principal": {
          "Service": "pods.eks.amazonaws.com"
        },
        "Action": [
          "sts:AssumeRole",
          "sts:TagSession"
        ]
      }
    ]
  }

権限とEKS紐づけですが、Pulumi C#での設定例は次の通りです。default namespaceで、test-appというService AccountをPod Identityに紐づける場合の例です。今回はSSM Parameter Storeからシークレットを取得するので、簡単のためAWSSecretsManagerClientReadOnlyAccessAmazonSSMReadOnlyAccessポリシーを付与しています。検証用に強い権限がついているので、必要なシークレットだけ取得するようにポリシーをカスタマイズしてください。

// Pulumi C#
var test = new IamRoleComponent($"{name}-test-app", new () { Parent = this }, new()
{
    AssumeRolePolicy = IamPolicy.GetAssumeRolePolicyJson("pods.eks.amazonaws.com", ["sts:TagSession"]),
    IamPolicyArg = new IamPolicyArg
    {
        PolicyArns = IamPolicy.GetAwsManagedPolicyArns(
        [
            // 強い権限なので必要に応じてカスタマイズしてください
            "arn:aws:iam::aws:policy/AWSSecretsManagerClientReadOnlyAccess",
            "arn:aws:iam::aws:policy/AmazonSSMReadOnlyAccess",
        ]),
    },
    RoleName = $"{name}-test-app",
});
foreach (var item in new[] { new NamespaceServiceAccountMapping("default", "test-app") })
{
    new PodIdentityAssociation($"{name}-podidentity-assoc-test-app-{item.Namespace}-{item.ServiceAccount}", new()
    {
        ClusterName = cluster.Name,
        RoleArn = test.Role.Arn,
        Namespace = item.Namespace,
        ServiceAccount = item.ServiceAccount,
        DisableSessionTags = false,
    });
}

private record NamespaceServiceAccountMapping(string Namespace, string ServiceAccount);

SSM Parameter Storeに次のようなシークレットを用意しておきます。

foobar: "foobar-value"
piyopiyo: "1234567"

これで準備は整いました。AWS provider for the Secrets Store CSI Driverは、DaemonSetとして各ノードにデプロイされています。

AWS Secrets Store CSI Driver providerを利用する

ASCPの基本的な使い方は2つあります。1はESOではできなかったパターン、2はESOのパターンです。

  1. シークレットをPodのボリュームへ直接マウントするパターン
  2. シークレットをKubernetes Secretとして同期しPodからKubernetes Secretを参照するパターン

Secret同期はSecretProviderClass定義するのですが、1,2を踏まえた構造は次のようになります。

apiVersion: secrets-store.csi.x-k8s.io/v1
kind: SecretProviderClass
metadata:
  name: test-app-secretstore
  namespace: default
spec:
  provider: aws
  # 1のパターン (2でもこれは必須)
  parameters:
    objects: |
      - objectName: "piyopiyo"
        objectType: "ssmparameter"
      - objectName: "foobar"
        objectType: "ssmparameter"
        objectAlias: "my-parameter"
    usePodIdentity: "true"
  # 2のパターンが必要なら以下を足す
  secretObjects:
    - secretName: test-app-secret
      type: Opaque
      data:
        - objectName: "piyopiyo"
          key: "PIYO"
        - objectName: "my-parameter"
          key: "PARAMETER"

これをベースにそれぞれのパターンをみてみましょう。

Podのボリュームへ直接マウントするパターン

ボリュームマウントパターン (SecretProviderClassでsecretsObjectsを定義しない場合) は、次のような特徴があります。

  • Podのボリュームとしてシークレットのマウントパスを指定する
  • External Secrets Operatorと違って、Kubernetes Secretが生成されない

シークレットと同期するためにSecretProviderClassを用意します。シークレットの同期設定はspec.parametersに定義します。provider: awsを指定し同期設定をしましょう。

  • usePodIdentity: true: Pod Identityを利用してAWS認証4
  • objectType: ssmparamter: SSM Parameter Storeからシークレットを取得
  • objectName: string: 取得するシークレット名を指定
  • objectAlias: string: マウント時のファイル名をシークレット名から変えたいときに指定(省略可能)
apiVersion: secrets-store.csi.x-k8s.io/v1
kind: SecretProviderClass
metadata:
  name: test-app-secretstore
  namespace: default
spec:
  provider: aws
  parameters:
    objects: |
      - objectName: "piyopiyo"
        objectType: "ssmparameter"
      - objectName: "foobar"
        objectType: "ssmparameter"
        objectAlias: "my-parameter"
    usePodIdentity: "true"

次にDeploymentを定義します。Podのボリュームとして、Secrets Store CSI Driverのボリュームをマウントすることを頭に入れておきましょう。また、PodIdentityで紐づけたService Accountを指定することで、Pod起動時にSSM Parameter Storeへアクセス認証され、Podがボリュームマウント、起動します。

---
apiVersion: v1
kind: ServiceAccount
metadata:
  name: test-app
  namespace: default
---
kind: Service
apiVersion: v1
metadata:
  name: test-app-svc
  namespace: default
  labels:
    app: test-app
spec:
  selector:
    app: test-app
  ports:
    - protocol: TCP
      port: 80
      targetPort: 80
---
apiVersion: apps/v1
kind: Deployment
metadata:
  name: test-app
  namespace: default
  labels:
    app: test-app
spec:
  replicas: 1
  selector:
    matchLabels:
      app: test-app
  template:
    metadata:
      labels:
        app: test-app
    spec:
      serviceAccountName: test-app
      containers:
        - name: nginx
          image: nginx:latest
          ports:
            - containerPort: 80
              name: http
          resources:
            limits:
              memory: "128Mi"
              cpu: "250m"
            requests:
              memory: "128Mi"
              cpu: "250m"
          volumeMounts:
            - name: secrets-store-inline
              mountPath: "/mnt/secrets-store"
              readOnly: true
      volumes:
        - name: secrets-store-inline
          csi:
            driver: secrets-store.csi.k8s.io
            readOnly: true
            volumeAttributes:
              secretProviderClass: "test-app-secretstore"

デプロイして、PodとSecretの状態を確認します。ESOと違ってSecretは生成されていないことがわかります。また、volumeにSecrets Store CSI Driverのボリュームがマウントされていることがわかります。

$ kubectl get po
NAME                        READY   STATUS    RESTARTS   AGE
test-app-5989fbd45f-rzk2d   1/1     Running   0          3m38s

$ kubectl get secret
No resources found in default namespace.

$ kubectl get po test-app-5989fbd45f-rzk2d -o yaml | kubectl neat
apiVersion: v1
kind: Pod
metadata:
  labels:
    app: test-app
    pod-template-hash: 5c74d5fd8b
  name: test-app-5989fbd45f-rzk2d
  namespace: default
spec:
  containers:
  - env:
    - name: AWS_STS_REGIONAL_ENDPOINTS
      value: regional
    // 省略...
    image: nginx:latest
    name: nginx
    // 省略...
    volumeMounts:
    - mountPath: /mnt/secrets-store
      name: secrets-store-inline
      readOnly: true
    - mountPath: /var/run/secrets/kubernetes.io/serviceaccount
      name: kube-api-access-kwk52
      readOnly: true
    - mountPath: /var/run/secrets/pods.eks.amazonaws.com/serviceaccount
      name: eks-pod-identity-token
      readOnly: true
  preemptionPolicy: PreemptLowerPriority
  priority: 0
  serviceAccountName: test-app
  // 省略...
  volumes:
  - name: eks-pod-identity-token
    projected:
      sources:
      - serviceAccountToken:
          audience: pods.eks.amazonaws.com
          expirationSeconds: 81586
          path: eks-pod-identity-token
  - csi:
      driver: secrets-store.csi.k8s.io
      readOnly: true
      volumeAttributes:
        secretProviderClass: test-app-secretstore
    name: secrets-store-inline
  // 省略...

Podにマウントされたボリュームを確認して、期待通りシークレットが取得できていることを確認しましょう。

$ kubectl exec -it test-app-5989fbd45f-rzk2d  -- /bin/bash
root@test-app-5989fbd45f-rzk2d:/# ls /mnt/secrets-store/
my-parameter  piyopiyo
root@test-app-5989fbd45f-rzk2d:/# cat /mnt/secrets-store/my-parameter
foobar-value
root@test-app-5989fbd45f-rzk2d:/# cat /mnt/secrets-store/piyopiyo
1234567

いい感じですね。

ESOと違ってKubernetes Secretを生成しない分、攻撃対象領域が減ります。 一方で、何か設定ミスでPodが起動してこない状況になった時は原因を特定しづらい点に注意です。Secretsが生成されるならSecretsの状態を見ることで原因を特定しやすいです。Secretsが生成されない場合、Podのログやイベントから原因を特定しましょう。

Kubernetes Secretへ同期するパターン

シークレット生成パターン (SecretProviderClassでsecretsObjectsを定義する場合) は、次のような特徴があります。

  • External Secrets Operatorと同様に、Kubernetes Secretが生成される

Kubernetes Secretsとシークレットと同期するためにSecretProviderClassを用意します。シークレットの同期設定はspec.parameters定義ですが、これに加えて、Kubernetes Secretの同期設定をspec.secretObjects定義に追加します。secretObjectsの定義は次のようになります。

  • secretName: string: 生成するKubernetes Secret名を指定
  • type: string: 生成するKubernetes Secretのタイプを指定
  • data: []: 生成するKubernetes Secretのデータを指定。objectNameでSecrets Store CSI Driverから取得するシークレット名を指定し、keyでKubernetes Secret内でのキー名を指定

parameters.objects[].objectAliasでエイリアス指定している場合は、secretObjects[].data.objectNameにもエイリアス名を指定する必要があることに注意してください。

apiVersion: secrets-store.csi.x-k8s.io/v1
kind: SecretProviderClass
metadata:
  name: test-app-secretstore
  namespace: default
spec:
  provider: aws
  parameters:
    objects: |
      - objectName: "piyopiyo"
        objectType: "ssmparameter"
      - objectName: "foobar"
        objectType: "ssmparameter"
        objectAlias: "my-parameter"
    usePodIdentity: "true"
  secretObjects:
    - secretName: test-app-secret
      type: Opaque
      data:
        - objectName: "piyopiyo"
          key: "PIYO"
        - objectName: "my-parameter"
          key: "PARAMETER"

次にDeploymentを定義します。先ほどとの違いとして、Podのボリュームマウントは不要で、Podからは生成されたKubernetes Secretを参照します。今回はわかりやすいように、envでKubernetes Secretを個別に参照しています。

apiVersion: apps/v1
kind: Deployment
metadata:
  name: test-app
  namespace: default
  labels:
    app: test-app
spec:
  replicas: 1
  selector:
    matchLabels:
      app: test-app
  template:
    metadata:
      labels:
        app: test-app
    spec:
      serviceAccountName: test-app
      containers:
        - name: nginx
          image: nginx:latest
          ports:
            - containerPort: 80
              name: http
          resources:
            limits:
              memory: "128Mi"
              cpu: "250m"
            requests:
              memory: "128Mi"
              cpu: "250m"
          volumeMounts:
            - name: secrets-store-inline
              mountPath: "/mnt/secrets-store"
              readOnly: true
          env:
            - name: PIYO
              valueFrom:
                secretKeyRef:
                  name: test-app-secret
                  key: PIYO
            - name: PARAMETER
              valueFrom:
                secretKeyRef:
                  name: test-app-secret
                  key: PARAMETER
      volumes:
        - name: secrets-store-inline
          csi:
            driver: secrets-store.csi.k8s.io
            readOnly: true
            volumeAttributes:
              secretProviderClass: "test-app-secretstore"

デプロイして、PodとSecretの状態を確認します。ESOと同様に、Secretが生成されていることがわかります。また、PodのenvがKubernetes Secretを参照していることがわかります。

$ kubectl get secret
NAME              TYPE     DATA   AGE
test-app-secret   Opaque   2      3m51s

$ kubectl get po
NAME                        READY   STATUS    RESTARTS   AGE
test-app-5c74d5fd8b-g2q9c   1/1     Running   0          5m11s

$ kubectl get po test-app-5c74d5fd8b-g2q9c -o yaml | kubectl neat
apiVersion: v1
kind: Pod
metadata:
  labels:
    app: test-app
    pod-template-hash: 5c74d5fd8b
  name: test-app-5c74d5fd8b-g2q9c
  namespace: default
spec:
  containers:
  - env:
    - name: PIYO
      valueFrom:
        secretKeyRef:
          key: PIYO
          name: test-app-secret
    - name: PARAMETER
      valueFrom:
        secretKeyRef:
          key: PARAMETER
          name: test-app-secret
    - name: AWS_STS_REGIONAL_ENDPOINTS
      value: regional
    // 省略...
    image: nginx:latest
    name: nginx
    // 省略...
    volumeMounts:
    - mountPath: /var/run/secrets/kubernetes.io/serviceaccount
      name: kube-api-access-kwk52
      readOnly: true
    - mountPath: /var/run/secrets/pods.eks.amazonaws.com/serviceaccount
      name: eks-pod-identity-token
      readOnly: true
  // 省略...
  serviceAccountName: test-app
  // 省略...
  volumes:
  - name: eks-pod-identity-token
    projected:
      sources:
      - serviceAccountToken:
          audience: pods.eks.amazonaws.com
          expirationSeconds: 81586
          path: eks-pod-identity-token
    // 省略...

Podのenvを確認して、期待通りシークレットが取得できていることを確認しましょう。

$ kubectl exec -it test-app-5c74d5fd8b-g2q9c -- /bin/bash
root@test-app-5c74d5fd8b-g2q9c:/# env | grep PIYO
PIYO=1234567
root@test-app-5c74d5fd8b-g2q9c:/# env | grep PARAMETER
PARAMETER=foobar-value

いい感じですね。ESO同様にKubernetes Secretを生成するので、ESOからの移行もスムーズに行えます。

TIPS: Secrets同期されずエラーが出るとき

デフォルトのEKS Addon構成だと、Secretsを作成するオプションsyncSecret: falseがデフォルトであるため、Secretsを生成できません。 この場合、Secrets APIにアクセスできないことがログでわかります。

$ stern secrets-store-csi-driver
secrets-store-csi-driver-pqpxz secrets-store I1203 07:17:15.486011       1 reflector.go:424]"pkg/mod/k8s.io/client-go@v0.26.4/tools/cache/reflector.go:169: failed to list *v1.Secret: secrets is forbidden: User \"system:serviceaccount:aws-secrets-manager:secrets-store-csi-driver\" cannot list resource \"secrets\" in API group \"\" at the cluster scope\n"
secrets-store-csi-driver-pqpxz secrets-store E1203 07:17:15.486080       1 reflector.go:140]"pkg/mod/k8s.io/client-go@v0.26.4/tools/cache/reflector.go:169: Failed to watch *v1.Secret: failed to list *v1.Secret: secrets is forbidden: User \"system:serviceaccount:aws-secrets-manager:secrets-store-csi-driver\" cannot list resource \"secrets\" in API group \"\" at the cluster scope\n"

原因は、CSIが利用するClusterRoleに権限がついていないためです。

$ kubectl get clusterrole aws-secrets-store-csi-driver-provider-cluster-role -o yaml  | kubectl neat
apiVersion: rbac.authorization.k8s.io/v1
kind: ClusterRole
metadata:
  labels:
    app: aws-secrets-store-csi-driver-provider
    app.kubernetes.io/instance: aws-secrets-store-csi-driver-provider
    app.kubernetes.io/managed-by: Helm
    app.kubernetes.io/name: aws-secrets-store-csi-driver-provider
    helm.sh/chart: aws-secrets-store-csi-driver-provider-2.1.1
  name: aws-secrets-store-csi-driver-provider-cluster-role
rules:
- apiGroups:
  - ""
  resources:
  - serviceaccounts/token
  verbs:
  - create
- apiGroups:
  - ""
  resources:
  - serviceaccounts
  verbs:
  - get
- apiGroups:
  - ""
  resources:
  - pods
  verbs:
  - get
- apiGroups:
  - ""
  resources:
  - nodes
  verbs:
  - get

$ kubectl get clusterrole secretproviderclasses-role -o yaml | kubectl neat
apiVersion: rbac.authorization.k8s.io/v1
kind: ClusterRole
metadata:
  labels:
    app: secrets-store-csi-driver
    app.kubernetes.io/instance: aws-secrets-store-csi-driver-provider
    app.kubernetes.io/managed-by: Helm
    app.kubernetes.io/name: secrets-store-csi-driver
    app.kubernetes.io/version: 1.5.4
    helm.sh/chart: secrets-store-csi-driver-1.5.4
  name: secretproviderclasses-role
rules:
- apiGroups:
  - ""
  resources:
  - events
  verbs:
  - create
  - patch
- apiGroups:
  - ""
  resources:
  - pods
  verbs:
  - get
  - list
  - watch
- apiGroups:
  - secrets-store.csi.x-k8s.io
  resources:
  - secretproviderclasses
  verbs:
  - get
  - list
  - watch
- apiGroups:
  - secrets-store.csi.x-k8s.io
  resources:
  - secretproviderclasspodstatuses
  verbs:
  - create
  - delete
  - get
  - list
  - patch
  - update
  - watch
- apiGroups:
  - secrets-store.csi.x-k8s.io
  resources:
  - secretproviderclasspodstatuses/status
  verbs:
  - get
  - patch
  - update
- apiGroups:
  - storage.k8s.io
  resourceNames:
  - secrets-store.csi.k8s.io
  resources:
  - csidrivers
  verbs:
  - get
  - list
  - watch

対応方法は簡単で、EKS AddonのConfiguration CustomizationにsyncSecret定義を追加します。

{"secrets-store-csi-driver":{"syncSecret":{"enabled":true}}}

alt text

alt text

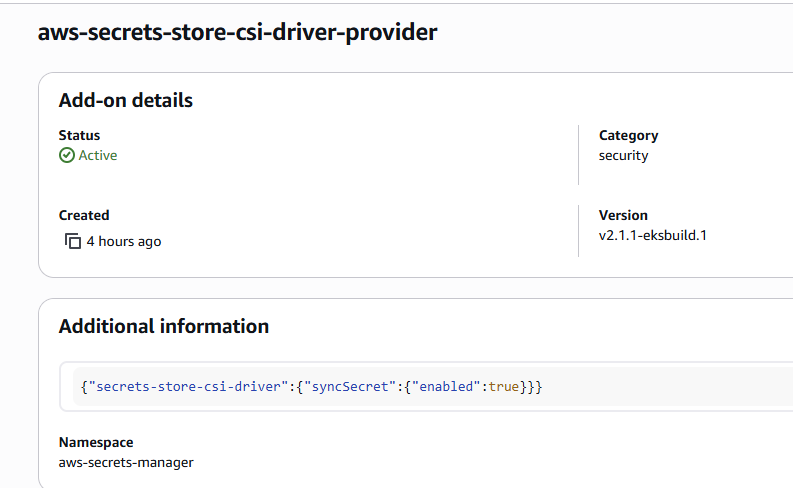
これで同期用のClusterRolesecretprovidersyncing-roleとClusterRoleBindingssecretprovidersyncing-rolebindingが作られ、ASCPがSecrets APIへアクセスできるようになります。

$ kubectl get clusterrole secretprovidersyncing-role -o yaml | kubectl neat
apiVersion: rbac.authorization.k8s.io/v1
kind: ClusterRole
metadata:
  labels:
    app: secrets-store-csi-driver
    app.kubernetes.io/instance: aws-secrets-store-csi-driver-provider
    app.kubernetes.io/managed-by: Helm
    app.kubernetes.io/name: secrets-store-csi-driver
    app.kubernetes.io/version: 1.5.4
    helm.sh/chart: secrets-store-csi-driver-1.5.4
  name: secretprovidersyncing-role
rules:
- apiGroups:
  - ""
  resources:
  - secrets
  verbs:
  - create
  - delete
  - get
  - list
  - patch
  - update
  - watch

$ kubectl get clusterrolebinding secretprovidersyncing-rolebinding -o yaml | kubectl neat
apiVersion: rbac.authorization.k8s.io/v1
kind: ClusterRoleBinding
metadata:
  labels:
    app: secrets-store-csi-driver
    app.kubernetes.io/instance: aws-secrets-store-csi-driver-provider
    app.kubernetes.io/managed-by: Helm
    app.kubernetes.io/name: secrets-store-csi-driver
    app.kubernetes.io/version: 1.5.4
    helm.sh/chart: secrets-store-csi-driver-1.5.4
  name: secretprovidersyncing-rolebinding
roleRef:
  apiGroup: rbac.authorization.k8s.io
  kind: ClusterRole
  name: secretprovidersyncing-role
subjects:
- kind: ServiceAccount
  name: secrets-store-csi-driver
  namespace: aws-secrets-manager

まとめ

EKS Addonになったことで導入、運用が劇的に楽になり、ESOからの移行も十分に検討できるレベルになりました。変に抽象化せず、awsならaws用のSecrets CSI Driver、Google Cloudなら、Azureなら... と個別のクラウド別に別リポジトリで管理されているのも好印象です。

認証はPod IdentityとIRSAの両方に対応しているので、namespaceが決め打ちできるコントローラー系はPod IdentityでOK。ブランチをnamespaceで分けてたり、B/Gデプロイなどでnamespaceが固定できないアプリはIRSAで認証すればよいでしょう。懸念は、コントローラー認証ではなくクライアント認証になるので、APIレートリミットに引っかかりやすくはなりそうです。EKS Addonで導入時は以下の追加コンフィグだけ設定すれば、OSS helm版やExternal Secrets Operatorでやりたいパターンが網羅できます。

{"secrets-store-csi-driver":{"syncSecret":{"enabled":true}}}

なお、AWS的にはセキュアのシナリオでは、AWS Secrets Manager Agentから取得してインメモリに保持しろというのは公式見解としてあるようです。

Security best practice recommends caching secrets in memory where possible. If you prefer to adopt the native Kubernetes experience, please follow the steps in this blog post. If you prefer to cache secrets in memory, we recommend using the AWS Secrets Manager Agent.

ASCPはKubernetesが提供するCSI Driverをうまく使っておりESOからの移行もスムーズにできるので、EKSでのシークレット管理はこれに落ち着きそうな気がします。

参考資料

AWS公式ドキュメント、ブログ

GitHubリポジトリ


  1. もともとkubernetes-extenal-secrets自体、itscontained/secret-managerContainerSolutions/externalsecret-operatorを統合するプロジェクトという由来があります
  2. いわゆるinline volume
  3. コミュニティ提供のEKS Addonは、新クラスターバージョンが提供されてからしばらくたたないと対応しない場合が多いためクラスターバージョンの更新タイミングに影響を与えてしまう
  4. IRSAを利用する場合、usePodIdentity: falseに設定します。

EKS CapabilityでArgoCDを展開する

2025/11/30、EKS Capabilityが発表されました。 Capabilityで実行するコントローラーは、EKS AutoModeの拡張のような形でAWSの保持するEKSが管理する実行環境で実行されるため、ユーザー管理のEKSクラスターではPodが実行されません。 感覚的には、Configurationが乏しいが完全AWS ManagedなEKS Addonのようなイメージです。

今回は、EKS Capabilityで実行するArgoCDはどのような感じなのか見てみましょう。私はOSS版のArgoCDを使っているので違いや制約がとても気になります。

短くまとめ

EKS CapabilityでArgoCDは動きます、しかも悪くない感じです。本番で使うにしても割とありより判断です。気になるところとして、ドキュメントにある制約が、書いてあるより引っかかりやすいです。忘れてはいけないのは、OSS版ArgoCDを見るとわかる通り、ArgoCD自体が多くのコンポーネントを必要として、Podも5台以上必要になることが多いです。Capability版はこれをAWSが管理してくれるので、運用負荷はかなり下がります。

OSS版でPod 0台にしてコストを下げる荒業は、EKS Capability版ではできずコンスタントに常時課金分がかかります。規模が小さいほど、たびたび思い出したように、えーって感じにはなりそう。しょうがない。

〇 よいところ

  • EKS CapabilityにセットしたIAM RoleでAWSサービス連携が容易なのは悪くない感じ
  • リモートクラスターをEKS Access Entryで登録するのもシンプルな感じでよい
  • ArgoCDはコンポーネントが複数あるしアップデートも割と大変なので任せられるのはあり

△ 気になるところ

  • インクラスターを登録するのにAmazonEKSClusterAdminPolicyをEKS Access Entryで紐づけるのは権限が気になる、バグ?
  • ArgoCD Notificationが使えない (Slack通知で困る)
  • 認証バックエンドがIdentity Centerに固定されている (Cognitoなど他IdPを使えない)
  • コストがちょっとかかる。Pod分が不要と思えばありな気もしなくはない。(ArgoCDはPod結構必要なので)

気にならない制約

  • Namespace supportは別になくても平気なのでよさそう。(ArgoCDのApplicationを複数のnamespaceにデプロイする機能。argocdnamespaceに集約すればいいので運用上は必須じゃない)
  • ArgoCD Image Updaterが使えない

EKS Capabilityを展開する

先日リリースされたばかりなので、TerraformやPulumiのようなIaCツールはまだAPIをサポートしていません。ドキュメントに沿って、AWS CLIかコンソールで操作できます。今回は、EKS AutoModeで展開したEKSクラスターに、AWSコンソールからArgoCDを展開します。

ArgoCD Capabilityを展開するには次の手順で進めます。

  • EKS CapabilityのためにIAM Roleを用意する
  • ArgoCD Capabilityを作成する

EKS CapabilityのためにIAM Roleを用意する

EKS Capabilityは、ユーザー管理EKSクラスターに対して操作するためIAM Roleを必要としているようです。 目新しいのがAsuumeRoleのcapabilities.eks.amazonaws.comです。また、権限にAWSSecretsManagerClientReadOnlyAccessを付けておくと、ArgoCDのリポジトリ参照時にSecrets Managerを参照できます。

apiVersion: v1
kind: Secret
metadata:
  name: private-repo
  namespace: argocd
  labels:
    argocd.argoproj.io/secret-type: repository
stringData:
  type: git
  url: https://github.com/org/repo
  secretArn: arn:aws:secretsmanager:ap-northeast-1:012345689:secret:argocd/github-token # AWSSecretsManagerClientReadOnlyAccessをIAM Roleにつけておくと、この参照ができる

IAM Roleを作成する模擬的なPulumi C#のコードは次のようになります。

var argoCDCapabilityRole = new IamRoleComponent($"{name}-capability-argocd", opt, new()
{
    RequireInstanceProfile = false,
    AssumeRolePolicy = IamPolicy.GetAssumeRolePolicyJson("capabilities.eks.amazonaws.com", ["sts.AssumeRole", "sts:TagSession"]),
    IamPolicyArg = new IamPolicyArg
    {
        PolicyArns = IamPolicy.GetAwsManagedPolicyArns(
        [
            "arn:aws:iam::aws:policy/AWSSecretsManagerClientReadOnlyAccess",
        ]),
    },
    RoleName = $"{name}-capability-argocd",
});

ArgoCD Capabilityを作成する

IAM Roleが用意できたらEKS Capabilityを作成します。ドキュメントにはAWS CLIでの手順が載っていますが、Identity Centerとの連携が必要なので正直コンソールでやる方が楽です。IaCサポートもまだないので、今回は雰囲気をつかむことも狙ってコンソールでやってみましょう。

まずはCapabilityのタブから、Create capabilityをクリックします。

alt text

Argo CDを選択します。

alt text

ArgoCD Capabilityの設定画面が表示されます。今回はクラスター名をautomode-clusterにしていることを踏まえてスクショと見比べてましょう。各項目は次の通りです。

  • Capability Name: デフォルトでクラスター名-argocd
  • Capability Role: 先ほど作成したIAM Roleを指定。AssumeRoleの信頼関係にcapabilities.eks.amazonaws.comが設定されていれば、ドロップダウンに表示される
  • ArgoCD endpoint access: PublicかPrivateを選択。今回はPublicを選択1
  • Authentication access: AWS Identity Center(IdC)のユーザー/グループとArgoCDのロールマッピング設定。管理を簡単・単純化するためにも、IdCはグループを使ってマッピングするのがよいでしょう。今回はAdminグループ:AdminロールViewOnlyグループ:Viewerロールでマッピング

Additional configuration and defaultsで、ArgoCDが管理するnamespaceを指定できますが、そのままがいいです。OSS版ArgoCDでもインストール先のnamespaceは一般的にargocdにするはずなので。AWS Capability版のArgoCDは、Applicationsの展開先Namespaceは1か所固定です。

alt text

確認画面が出るので、問題なければ作成しましょう。

作成後、Capabilitiesタブに戻り、作成したCapabilityのステータスがACTIVEになっていることを確認します。

alt text

また、クラスターでCRDを見るとArgoCDのカスタムリソースが取得できるはずです。(大事)

$ kubectl api-resources | grep argoproj.io
applications                        app,apps           argoproj.io/v1alpha1              true         Application
applicationsets                     appset,appsets     argoproj.io/v1alpha1              true         ApplicationSet
appprojects                         appproj,appprojs   argoproj.io/v1alpha1              true         AppProject

CapabilityのArgoCDにアクセスする

EKSコンソールからCapabilityタブでArgoCDを選択して、詳細を表示します。Argo API endpointにあるURLから、ArgoCDのWeb UIにアクセスできます。

alt text

いつものArgoCDのSSOログイン画面が表示されるので、LOGIN VIA SSOをクリックしてIdentity Centerの認証でログインします。どうやらArgoCD内部の独自OIDC実装ではなくDexを使っているようで、OIDCのリフレッシュトークンを見ないバグはないようです。

alt text

Identity Centerでログインしているなら、スムーズにArgoCDのダッシュボードが表示されます。ログインしていない場合は、Identity Centerのログイン画面が表示されます。

alt text

動作しているArgoCDバージョンは、EKS Consoleの表示と同様に3.1.8+eks-1のようです。OSS版の3.1.8は2025/10/1リリースされているので、1か月遅れくらいでCapability版に反映されている感じですね。

クラスターの追加

やっていて罠がクラスター追加でした。

OSS版のArgoCDはインクラスターのKubernetesクラスターをデフォルトで追加します。しかし、CapabilityのArgoCDはクラスターが空っぽです。クラスター追加しましょう。

alt text

クラスターの追加は、argocd cliSecretsドキュメントで紹介されていますが、いざ追加しようとしてもどっちもスムーズにいきません。

ということで順番に見ていきましょう。

argocd cliでクラスターを追加する

argocd cliは、通常argocd loginでArgoCDのエンドポイントにログインします。しかし、CapabilityのArgoCDはargocd loginをサポートしていません。代わりの接続セットアップはドキュメントで次のようになっています。環境変数を使った暗黙の認証ですね。

# 暗黙の認証を設定する
CLUSTER_NAME=my-cluster
CAPABILITY_NAME="$CLUSTER_NAME-argocd"
MYPROFILE="foobar"
export ARGOCD_SERVER=$(aws eks describe-capability --cluster-name $CLUSTER_NAME --capability-name $CAPABILITY_NAME --query 'capability.configuration.argoCd.serverUrl' --output text --profile $MYPROFILE)
export ARGOCD_AUTH_TOKEN="ArgoCD Web UIからAPIトークンを発行する"
export ARGOCD_OPTS="--grpc-web"

# 後段で使うEKSクラスターのARNを取得する
CLUSTER_ARN=$(aws eks describe-cluster --name $CLUSTER_NAME --query 'cluster.arn' --output text --profile $MYPROFILE)

問題はこれでクラスターを追加しようとしても、うまくいきません。

$ argocd cluster add $CLUSTER_ARN --aws-cluster-name $CLUSTER_ARN --name in-cluster --project default
{"level":"fatal","msg":"rpc error: code = Unknown desc = Post \"https://https//dummy01234567890.eks-capabilities.ap-northeast-1.amazonaws.com/cluster.ClusterService/Create\": dial tcp: lookup https on 10.255.255.254:53: read udp 10.255.255.254:45086-\u003e10.255.255.254:53: i/o timeout","time":"2025-12-03T18:47:21+09:00"}

$ argocd cluster add $CLUSTER_ARN --aws-cluster-name $CLUSTER_ARN --name in-cluster --project default --insecure
{"level":"fatal","msg":"rpc error: code = Unknown desc = Post \"https://https//dummy01234567890.eks-capabilities.ap-northeast-1.amazonaws.com/cluster.ClusterService/Create\": dial tcp: lookup https on 10.255.255.254:53: read udp 10.255.255.254:45086-\u003e10.255.255.254:53: i/o timeout","time":"2025-12-03T18:47:21+09:00"}

対処として、ARGOCD_SERVERは通常https://を省くので、これを省くとうまくいきます。罠すぎる。

$ ARGOCD_SERVER=$(aws eks describe-capability --cluster-name $CLUSTER_NAME --capability-name $CAPABILITY_NAME --query 'capability.configuration.argoCd.serverUrl' --output text --profile $MYPROFILE | sed 's/^https:\/\///')
$ argocd cluster add $CLUSTER_ARN --aws-cluster-name $CLUSTER_ARN --name in-cluster --project default
Cluster 'https://dummy01234567890.gr7.ap-northeast-1.eks.amazonaws.com' added

alt text

alt text

Secretsでクラスターを追加する

Secretsで追加する場合、次のようなSecretをargocd namespaceに作成します。これはドキュメント通りです。今回はプロジェクトを追加しないので、project: defaultにしています。もし、初めてArgoCDを触るなら、まずはおとなしくdefaultプロジェクトに追加するのがよいでしょう。

$ kubectl apply -f - <<EOF
apiVersion: v1
kind: Secret
metadata:
  name: in-cluster
  namespace: argocd
  labels:
    argocd.argoproj.io/secret-type: cluster
stringData:
  name: in-cluster
  server: arn:aws:eks:ap-northeast-1:0123456789:cluster/my-cluster
  project: default
EOF

ちなみにOSS版ArgoCDのように、https://kubernetes.default.svcのようなインクラスターのKubernetes APIエンドポイントを指定してもクラスターが追加されません。EKS Capability版では、EKSクラスターのARNを指定する必要があるようです。2

# 機能しない
apiVersion: v1
kind: Secret
metadata:
  name: in-cluster
  namespace: argocd
  labels:
    argocd.argoproj.io/secret-type: cluster
stringData:
  name: in-cluster
  server: https://kubernetes.default.svc
  project: default

EKS Access Entryの権限を調整する

このままいざアプリケーションを追加するとすると、次のようなAPIアクセスエラーが発生します。エラーになるKubernetes APIは、その時々で変わるのですが基本的に何にもアクセスできない感じです。

Failed to load live state: failed to get cluster info for "arn:aws:eks:ap-northeast-1:0123456789:cluster/my-cluster": error synchronizing cache state : failed to sync cluster https://dummy01234567890.ap-northeast-1.prod.ccs.eks.aws.dev: failed to load initial state of resource CSINode.storage.k8s.io: failed to list resources: csinodes.storage.k8s.io is forbidden: User "arn:aws:sts::0123456789:assumed-role/my-eks-capability-argocd/aws-go-sdk-1764755848957927621" cannot list resource "csinodes" in API group "storage.k8s.io" at the cluster scope

原因は、EKS Access Entryに紐づけたAccess Policyの権限が不足しているためです。ドキュメントには、リモートクラスターの時だけAmazonEKSClusterAdminPolicyを紐づけるように書かれていますが、インクラスターでも必要なようです。恐らくCapabilityのバグ(あるいは何かおかしい)と予想していますが、いったん追加しましょう。

EKS ConsoleのAccess Entriesタブに移動します。ArgoCD Capabilityを追加すると、自動的にarn:aws:iam::0123456789:role/mycluster-eks-capability-argocdというEKS Access Entryが作成されています。これを見ると、AmazonEKSArgoCDClusterPolicy, AmazonEKSArgoCDPolicyの2ポリシーが紐づいています。

alt text

Attach policiesボタンをクリックして、AmazonEKSClusterAdminPolicyを追加しましょう。3

alt text

aws cliで調整してもいいでしょう。

aws eks associate-access-policy \
  --cluster-name my-cluster \
  --principal-arn arn:aws:iam::0123456789:role/mycluster-eks-capability-argocd \
  --policy-arn arn:aws:eks::aws:cluster-access-policy/AmazonEKSClusterAdminPolicy \
  --access-scope type=cluster

before

alt text

after

alt text

アプリケーションを追加する

お待ちかねのアプリケーション追加です。今回は、簡単のためパブリックなGitHubリポジトリにあるサンプルアプリケーションを追加することで、ArgoCDのリポジトリ登録を省略します。試しに私のリポジトリguitarrapc/argocd-labにあるアプリケーションを追加します。

$ kubectl apply -f - <<EOF
apiVersion: argoproj.io/v1alpha1
kind: Application
metadata:
  name: argocd-lab
  namespace: argocd
spec:
  project: default
  source:
    repoURL: https://github.com/guitarrapc/argocd-lab.git
    targetRevision: main
    path: k8s/api
  destination:
    name: in-cluster # Rename to actual cluster name if needed
    namespace: argocd-lab
  syncPolicy:
    automated:
      prune: true
      selfHeal: true
    syncOptions:
      - CreateNamespace=true
EOF

ここでもしAPIエラーが発生したら、EKS Access Entryの権限を見直しましょう。

問題なくアプリケーションが追加できれば、次のように表示されます。

alt text

$ kubectl get all -n argocd-lab
NAME                            READY   STATUS    RESTARTS   AGE
pod/api-csharp-5c77f5d6-wwttt   1/1     Running   0          4m20s
pod/api-go-6dc5c4c5ff-4tmdk     1/1     Running   0          4m20s

NAME                     TYPE        CLUSTER-IP      EXTERNAL-IP   PORT(S)   AGE
service/api-csharp-svc   ClusterIP   172.20.44.169   <none>        80/TCP    4m20s
service/api-go-svc       ClusterIP   172.20.207.24   <none>        80/TCP    4m20s

NAME                         READY   UP-TO-DATE   AVAILABLE   AGE
deployment.apps/api-csharp   1/1     1            1           4m20s
deployment.apps/api-go       1/1     1            1           4m20s

NAME                                  DESIRED   CURRENT   READY   AGE
replicaset.apps/api-csharp-5c77f5d6   1         1         1       4m20s
replicaset.apps/api-go-6dc5c4c5ff     1         1         1       4m20s

仮に、Kubernets上からGoのAPIサーバーDeploymentを削除しても、ArgoCDが自動的に復元してくれます。

$ kubectl delete deployment api-go -n argocd-lab
deployment.apps "api-go" deleted

alt text

3秒ほどで復元されました。

$ kubectl get deploy -n argocd-lab
NAME         READY   UP-TO-DATE   AVAILABLE   AGE
api-csharp   1/1     1            1           5m15s
api-go       1/1     1            1           34s

alt text

ポートフォワードでアクセスしてみましょう。

$ kubectl port-forward -n argocd-lab svc/api-csharp-svc 8080:80
$ curl http://localhost:8080/
{"machineName":"api-csharp-56f8866dcd-qkkhw","osDescription":"Ubuntu 24.04.3 LTS","processorCount":1,"usedMemoryInMB":5}

$ kubectl port-forward -n argocd-lab svc/api-go-svc 8081:80
$ curl http://localhost:8081/
{"machineName":"api-go-64665c8c5f-2brsk","osDescription":"linux amd64","processorCount":2,"usedMemoryInMB":0}

削除もいつも通りです。アプリケーションを消してもいいですし、ArgoCD UIから削除してもOKです。

alt text

できないこと

OSS版ArgoCDを使っているため、ドキュメントで示されている「Capability版でできないこと」のいくつかが気になります。

ArgoCD Notificationsが使えない

ArgoCD Notificationsは、ArgoCDのイベントをSlackなどに通知する仕組みです。Capability版のArgoCDは、現状この機能をサポートしていません。

具体的には、ArgoCDはコントローラーの状態やNodeの状態によって、アプリケーションの同期状態が変わります。これをSlackなどに通知するときにArgoCD Notificationsを使います。Slack通知がないと見落としやすいため、使えないのはちょっと痛いです。

ArgoCD RBACはいじれない

OSS版ArgoCDは、ポリシーを定義することで自由にArgoCD内部RBACを設定できました。しかし、Capability版ではこの設定ができず、AdminEditorViewerの3ロールに固定されています。細かい権限設定ができないのはちょっと困ります。

たとえば、Syncでデプロイはできるけど、リソースの直接削除・編集はさせたくない。などは調整できない感じですね。

IdentityCenter以外のSSO認証がない

OSS版ArgoCDは任意のOIDC認証を設定できるので、CognitoやAuth0、Okta、Azure EntraID、Google Workspaceなど認証バックエンドを自由に選択できます。Capability版は、現状Identity Centerに固定されています。Identity Centerは悪くないのですが、他の認証バックエンドを使いたい場合は困ります。

個人的にうへーって感じなので、割と深刻に困る人はいるんじゃないですかね。Identity CenterをIdPとして利用するのって、これまであまりなかったような気がします。

ApplicationのNamespaceが一つ

OSS版ArgoCDは複数のNamespaceにApplicatcionをデプロイできましたが、Capability版では1Namespaceに固定されています。デフォルトならargocdNamespaceです。運用回避が可能な範囲ですが、アプリケーションと一緒のnamespaceにデプロイしたい時は困るでしょう。

現状は制約ですが、将来改善予定のようです。

Argo CD Image Updaterが使えない

Argo CD Image Updaterは、コンテナイメージのバージョン更新を検知して、GitHubなどのマニフェストリポジトリに更新PRを自動で作成する仕組みです。これを前提にできるならCIはマニフェストの展開を考える必要がなくなり、イメージプッシュまでが責務になるので便利。ですが、Capability版ではこの機能がサポートされていません。

しょうがない。

無理やりPodを消せない

割と力づくなのでめったにやらないのですが、OSS版ArgoCDでは特定のArgoCDコントローラーを強制に停止させることで、Podを0台にしてランニングコストを下げることができます。しかし、Capability版ではCapabilityが設定されているだけで時間課金されるため、コストを強制的に下げるみたいな荒業は使えません。一長一短ですね。

あと、CRDがかかわっているのでCapability版のArgoCDをアンインストールする前に、Applicationを忘れず削除する必要があるなどは忘れそうで注意です。

コスト

ArgoCD Capabilityのコストは次の通りです。料金は英語ページにしかまだ載ってないようです。

アプリケーションが多いほどお金かかるのはArgoCD的の負荷的にはそうなんですが、OSS版ArgoCDで考えるとアプリケーションが1,2つ増えてもPod負荷は変わらないので、フーンってお気持ちです。10とかあると変わるんですけどね。とはいえ、維持費が$26.98992/month、アプリケーション5つが常時稼働で$6.6708/month、合計$33.66072/monthです。まあ、ArgoCDのPodを5台以上立てることを考えると妥当な気もします。4

  • Argo CD base charge $0.037486 per Argo CD Capability hour (Capability自体の維持費)
  • Argo CD usage charge $0.001853 per Argo CD Application hour (Applicationあたりの維持費)

alt text

TIPS

コンテキスト名を変えてargocd cliを使いたい

Kubernetes ContextでEKS Clusterの接続名を変えると、クラスター追加時のargocdコマンドが変わります。TIPSとしておいておきます。

例えば、コンテキスト名をarn形式arn:aws:eks....からクラスター名my-clusterにしたとしましょう。すると、argocd cliでクラスター追加時にコンテキスト名が一致せず失敗します。

$ kubectx ${CLUSTER_NAME}=arn:aws:eks:${REGION}:${ACCOUNT_ID}:cluster/${CLUSTER_NAME}
$ argocd cluster add $CLUSTER_ARN --aws-cluster-name $CLUSTER_ARN --name in-cluster --project default
{"level":"fatal","msg":"context arn:aws:eks:ap-northeast-1:012345689:cluster/my-cluster does not exist in kubeconfig","time":"2025-12-03T19:30:14+09:00"}

この場合、$CLUSTER_ARNの代わりに、コンテキストの名前${CLUSTER_NAME}を指定します。

$ argocd cluster add $CLUSTER_NAME --aws-cluster-name $CLUSTER_ARN --name in-cluster --project default
Cluster 'https://dummy01234567890.gr7.ap-northeast-1.eks.amazonaws.com' added

まとめ

EKS CapabilityでArgoCDを展開してみました。現状でも十分に使えそうですが、いくつか気になる点もあります。特にEKS Access Entryの権限周りは、もう少し改善してほしいところです。

IaC側のサポートがないので、今のままだとCapabilityを追加しても、クラスターを消すときに連動しないので厄介です。Terraformは実装中で、Pulumi.Awsはこれが入ったら自動変換で入る想定なので、少し待ちましょう。

参考


  1. これかなり微妙です。PublicだとPublicにログイン画面へ到達できるので、正直Privateがよいです。いくらIdentity Centerで認証してもPublicにログイン画面が出てしまうのは、想定外の状況で攻撃ベクターを不要に与えることになります。Privateにして、VPC Endpoint経由でアクセスするのがよいですが、正直IP制限かZero TrustなネットワークをAWSが提供してほしい。
  2. AWS側のコントローラーでarnフォーマットかチェックしてそう。
  3. これ、権限強すぎるし、原理的にもおかしいので、バグっぽいですがどうなんでしょう
  4. EKS、こういう時に地味にお金かかるって感じあるんですよね。常時動かなくても、Serverless的な感じで時々フックされて動いてくれればいいのに、と運用してて感じることがあります。ありませんか?

KubesharkでKubernetesのトラフィックを見てみる

「ちょっとこのサーバーの通信がおかしそう、通信の中身を見たい」となったときに便利なのがWiresharkです。tcpdumpのようなコマンドラインツールもありますが、GUIでパケットの中身を見られるWiresharkは非常に便利です。 ではKubernetes環境で動いているPodの通信を見たいときはどうすればよいでしょうか? Podの中にWiresharkを入れてもそのPod内の通信しか見られませんし、ホストに入れてもKubernetesの仮想ネットワークの中身は見られません。

これを可能にするのがKubesharkです。今回はそのメモ。

2025/11/26時点

現在、kubeshark.coはDNSトラブルでアクセス問題が生じています。これが安定するまで挙動が不確かなので注意です。まぁまぁひどい状況で、早く安定するとイイデスネ。

alt text

Kubesharkとは

KubesharkはKubernetes環境向けのWiresharkのようなツールです。Kubernetesクラスター内のすべてのPod間通信をキャプチャし、プロトコルレベルでの可視化を提供します。KubesharkはKubernetesのネットワークトラフィックをリアルタイムで監視し、コンテナ、Pod、ノード、クラスター間のすべての通信とペイロードをキャプチャします。

TCP、UDP、HTTP、gRPC、DNS、Redis、Kafkaなど様々なプロトコルに対応しており、またKubernetesのメタデータ(Pod名、ネームスペース、ラベルなど)と連携してトラフィックをフィルタリングできます。これこれって感じのツールです。

いい感じのダッシュボードが提供されており、ブラウザでアクセスしてトラフィックを確認できます。

alt text

今キャプチャしているトラフィックでネットワークマップが描画され、通信量が見えるのはとても良いです。トラフィックマップは見られても、通信量を可視化したものは意外とないんですよね。

alt text

価格設定は4ノードまでは無料、それ以上は有料です。小規模なクラスターで試したりするといいでしょう。

インストール

インストールはhomebrewとhelmの2パターンあります。

CLIでインストールする

homebrewの場合、kubesharkのCLIツールを使います。

brew install kubeshark
kubeshark tap

# クリーンナップ
kubeshark clean

helmでインストールする

helmでインストールしましょう。1

helm repo add kubeshark https://helm.kubehq.com
helm repo update
helm upgrade --install kubeshark kubeshark/kubeshark --version 52.3.92 -n default

# クリーンナップ
helm uninstall kubeshark -n default

起動確認

起動すると次の表示になります。kubesharkの場合、defaultネームスペースにインストールがちょうどいい感じな感じします。

$ k get po -n default
NAME                                READY   STATUS    RESTARTS   AGE
kubeshark-front-6cb67f87df-dsgq8    1/1     Running   0          91m
kubeshark-hub-fc65c5867-slkkh       1/1     Running   0          91m
kubeshark-worker-daemon-set-799l2   2/2     Running   0          32m
kubeshark-worker-daemon-set-c66x6   2/2     Running   0          32m
kubeshark-worker-daemon-set-l9fsl   2/2     Running   0          91m

アクセス

インストール完了したら、port-forwardでアクセスします。Dexなども対応がありますが、シンプルにport-forwardでアクセスするのが手っ取り早いです。

$ kubectl port-forward service/kubeshark-front 8899:80
Forwarding from 127.0.0.1:8899 -> 8080
Forwarding from [::1]:8899 -> 8080
Handling connection for 8899

ブラウザでhttp://localhost:8899にアクセスします。ちょっとすると画面が表示されます。2

ワークロードを準備する

動作を確認するため、ちょうどいいワークロードを展開しましょう。

  1. ゲストブックアプリケーション: https://cloud.google.com/kubernetes-engine/docs/tutorials/guestbook?hl=ja
  2. Bookinfoアプリケーション3: https://github.com/digitalocean/kubernetes-sample-apps/tree/master/bookinfo-example
  3. etcdクラスタ: https://etcd.io/docs/v3.5/op-guide/kubernetes/

Guestbookアプリケーション

Redisをバックエンドに使ったシンプルなWebアプリケーションです。Redisのリーダー・フォロワー構成もあるので、Kubernetes内の通信がいろいろ発生します。

# デプロイ
$ kubectl apply -f ./guestbook.yaml

# 動作確認
$ kubectl get po -n guestbook
NAME                              READY   STATUS    RESTARTS   AGE
frontend-6b46678c94-2lx2v         1/1     Running   0          18m
frontend-6b46678c94-xtkpw         1/1     Running   0          20m
redis-follower-66847965fb-m9vtk   1/1     Running   0          20m
redis-follower-66847965fb-w8d7h   1/1     Running   0          20m
redis-leader-665d87459f-ctzvd     1/1     Running   0          20m

# ポートフォワード
$ kubectl port-forward svc/frontend 8090:80 -n guestbook

# 削除
$ kubectl delete -f ./guestbook.yaml

クリックでguestbook.yamlの定義を見る

apiVersion: v1
kind: Namespace
metadata:
  name: guestbook
---
apiVersion: apps/v1
kind: Deployment
metadata:
  name: redis-leader
  namespace: guestbook
  labels:
    app: redis
    role: leader
    tier: backend
spec:
  replicas: 1
  selector:
    matchLabels:
      app: redis
  template:
    metadata:
      labels:
        app: redis
        role: leader
        tier: backend
    spec:
      containers:
        - name: leader
          image: "docker.io/redis:6.0.5"
          resources:
            requests:
              cpu: 100m
              memory: 100Mi
          ports:
            - containerPort: 6379
---
apiVersion: v1
kind: Service
metadata:
  name: redis-leader
  namespace: guestbook
  labels:
    app: redis
    role: leader
    tier: backend
spec:
  ports:
    - port: 6379
      targetPort: 6379
  selector:
    app: redis
    role: leader
    tier: backend
---
apiVersion: apps/v1
kind: Deployment
metadata:
  name: redis-follower
  namespace: guestbook
  labels:
    app: redis
    role: follower
    tier: backend
spec:
  replicas: 2
  selector:
    matchLabels:
      app: redis
  template:
    metadata:
      labels:
        app: redis
        role: follower
        tier: backend
    spec:
      containers:
        - name: follower
          image: us-docker.pkg.dev/google-samples/containers/gke/gb-redis-follower:v2
          resources:
            requests:
              cpu: 100m
              memory: 100Mi
          ports:
            - containerPort: 6379
---
apiVersion: v1
kind: Service
metadata:
  name: redis-follower
  namespace: guestbook
  labels:
    app: redis
    role: follower
    tier: backend
spec:
  ports:
    # the port that this service should serve on
    - port: 6379
  selector:
    app: redis
    role: follower
    tier: backend
---
apiVersion: apps/v1
kind: Deployment
metadata:
  name: frontend
  namespace: guestbook
spec:
  replicas: 2
  selector:
    matchLabels:
      app: guestbook
      tier: frontend
  template:
    metadata:
      labels:
        app: guestbook
        tier: frontend
    spec:
      containers:
        - name: php-redis
          image: us-docker.pkg.dev/google-samples/containers/gke/gb-frontend:v5
          env:
            - name: GET_HOSTS_FROM
              value: "dns"
          resources:
            requests:
              cpu: 100m
              memory: 100Mi
          ports:
            - containerPort: 80
---
apiVersion: v1
kind: Service
metadata:
  name: frontend
  namespace: guestbook
  labels:
    app: guestbook
    tier: frontend
spec:
  # type: LoadBalancer
  type: ClusterIP
  ports:
    # the port that this service should serve on
    - port: 80
  selector:
    app: guestbook
    tier: frontend

デプロイするとhttp://localhost:8090にアクセスして、動作確認できます。

alt text

Bookinfoアプリケーション

簡易的なマイクロサービスアプリケーションです。通信がいろいろ発生するので、トラフィックの確認にちょうどいいです。

# デプロイ
$ kubectl apply -f ./bookinfo.yaml

# 動作確認
$ kubectl get po -n bookinfo
NAME                              READY   STATUS    RESTARTS   AGE
details-v1-5556dbb5b-sx5zs        1/1     Running   0          18m
productpage-v1-7d8dc8b558-pzpkf   1/1     Running   0          18m
ratings-v1-66fbfdcc7b-pcznd       1/1     Running   0          18m
reviews-v1-5d4d5544f6-4qg2b       1/1     Running   0          18m
reviews-v2-7c6c945484-ft2f4       1/1     Running   0          18m
reviews-v3-8648897d5b-j9b65       1/1     Running   0          18m

# ポートフォワード
$ kubectl port-forward svc/productpage 8091:9080 -n bookinfo

# 削除
$ kubectl delete -f ./bookinfo.yaml

クリックでbookinfo.yamlの定義を見る

apiVersion: v1
kind: Namespace
metadata:
  name: bookinfo
---
# Copyright Istio Authors
#
#   Licensed under the Apache License, Version 2.0 (the "License");
#   you may not use this file except in compliance with the License.
#   You may obtain a copy of the License at
#
#       http://www.apache.org/licenses/LICENSE-2.0
#
#   Unless required by applicable law or agreed to in writing, software
#   distributed under the License is distributed on an "AS IS" BASIS,
#   WITHOUT WARRANTIES OR CONDITIONS OF ANY KIND, either express or implied.
#   See the License for the specific language governing permissions and
#   limitations under the License.

##################################################################################################
# This file defines the services, service accounts, and deployments for the Bookinfo sample.
#
# To apply all 4 Bookinfo services, their corresponding service accounts, and deployments:
#
#   kubectl apply -f samples/bookinfo/platform/kube/bookinfo.yaml
#
# Alternatively, you can deploy any resource separately:
#
#   kubectl apply -f samples/bookinfo/platform/kube/bookinfo.yaml -l service=reviews # reviews Service
#   kubectl apply -f samples/bookinfo/platform/kube/bookinfo.yaml -l account=reviews # reviews ServiceAccount
#   kubectl apply -f samples/bookinfo/platform/kube/bookinfo.yaml -l app=reviews,version=v3 # reviews-v3 Deployment
##################################################################################################

##################################################################################################
# Details service
##################################################################################################
apiVersion: v1
kind: Service
metadata:
  name: details
  namespace: bookinfo
  labels:
    app: details
    service: details
spec:
  ports:
    - port: 9080
      name: http
  selector:
    app: details
---
apiVersion: v1
kind: ServiceAccount
metadata:
  name: bookinfo-details
  namespace: bookinfo
  labels:
    account: details
---
apiVersion: apps/v1
kind: Deployment
metadata:
  name: details-v1
  namespace: bookinfo
  labels:
    app: details
    version: v1
spec:
  replicas: 1
  selector:
    matchLabels:
      app: details
      version: v1
  template:
    metadata:
      labels:
        app: details
        version: v1
    spec:
      serviceAccountName: bookinfo-details
      containers:
        - name: details
          image: docker.io/istio/examples-bookinfo-details-v1:1.16.4
          imagePullPolicy: IfNotPresent
          ports:
            - containerPort: 9080
          securityContext:
            runAsUser: 1000
---
##################################################################################################
# Ratings service
##################################################################################################
apiVersion: v1
kind: Service
metadata:
  name: ratings
  namespace: bookinfo
  labels:
    app: ratings
    service: ratings
spec:
  ports:
    - port: 9080
      name: http
  selector:
    app: ratings
---
apiVersion: v1
kind: ServiceAccount
metadata:
  name: bookinfo-ratings
  namespace: bookinfo
  labels:
    account: ratings
---
apiVersion: apps/v1
kind: Deployment
metadata:
  name: ratings-v1
  namespace: bookinfo
  labels:
    app: ratings
    version: v1
spec:
  replicas: 1
  selector:
    matchLabels:
      app: ratings
      version: v1
  template:
    metadata:
      labels:
        app: ratings
        version: v1
    spec:
      serviceAccountName: bookinfo-ratings
      containers:
        - name: ratings
          image: docker.io/istio/examples-bookinfo-ratings-v1:1.16.4
          imagePullPolicy: IfNotPresent
          ports:
            - containerPort: 9080
          securityContext:
            runAsUser: 1000
---
##################################################################################################
# Reviews service
##################################################################################################
apiVersion: v1
kind: Service
metadata:
  name: reviews
  namespace: bookinfo
  labels:
    app: reviews
    service: reviews
spec:
  ports:
    - port: 9080
      name: http
  selector:
    app: reviews
---
apiVersion: v1
kind: ServiceAccount
metadata:
  name: bookinfo-reviews
  namespace: bookinfo
  labels:
    account: reviews
---
apiVersion: apps/v1
kind: Deployment
metadata:
  name: reviews-v1
  namespace: bookinfo
  labels:
    app: reviews
    version: v1
spec:
  replicas: 1
  selector:
    matchLabels:
      app: reviews
      version: v1
  template:
    metadata:
      labels:
        app: reviews
        version: v1
    spec:
      serviceAccountName: bookinfo-reviews
      containers:
        - name: reviews
          image: docker.io/istio/examples-bookinfo-reviews-v1:1.16.4
          imagePullPolicy: IfNotPresent
          env:
            - name: LOG_DIR
              value: "/tmp/logs"
          ports:
            - containerPort: 9080
          volumeMounts:
            - name: tmp
              mountPath: /tmp
            - name: wlp-output
              mountPath: /opt/ibm/wlp/output
          securityContext:
            runAsUser: 1000
      volumes:
        - name: wlp-output
          emptyDir: {}
        - name: tmp
          emptyDir: {}
---
apiVersion: apps/v1
kind: Deployment
metadata:
  name: reviews-v2
  namespace: bookinfo
  labels:
    app: reviews
    version: v2
spec:
  replicas: 1
  selector:
    matchLabels:
      app: reviews
      version: v2
  template:
    metadata:
      labels:
        app: reviews
        version: v2
    spec:
      serviceAccountName: bookinfo-reviews
      containers:
        - name: reviews
          image: docker.io/istio/examples-bookinfo-reviews-v2:1.16.4
          imagePullPolicy: IfNotPresent
          env:
            - name: LOG_DIR
              value: "/tmp/logs"
          ports:
            - containerPort: 9080
          volumeMounts:
            - name: tmp
              mountPath: /tmp
            - name: wlp-output
              mountPath: /opt/ibm/wlp/output
          securityContext:
            runAsUser: 1000
      volumes:
        - name: wlp-output
          emptyDir: {}
        - name: tmp
          emptyDir: {}
---
apiVersion: apps/v1
kind: Deployment
metadata:
  name: reviews-v3
  namespace: bookinfo
  labels:
    app: reviews
    version: v3
spec:
  replicas: 1
  selector:
    matchLabels:
      app: reviews
      version: v3
  template:
    metadata:
      labels:
        app: reviews
        version: v3
    spec:
      serviceAccountName: bookinfo-reviews
      containers:
        - name: reviews
          image: docker.io/istio/examples-bookinfo-reviews-v3:1.16.4
          imagePullPolicy: IfNotPresent
          env:
            - name: LOG_DIR
              value: "/tmp/logs"
          ports:
            - containerPort: 9080
          volumeMounts:
            - name: tmp
              mountPath: /tmp
            - name: wlp-output
              mountPath: /opt/ibm/wlp/output
          securityContext:
            runAsUser: 1000
      volumes:
        - name: wlp-output
          emptyDir: {}
        - name: tmp
          emptyDir: {}
---
##################################################################################################
# Productpage services
##################################################################################################
apiVersion: v1
kind: Service
metadata:
  name: productpage
  namespace: bookinfo
  labels:
    app: productpage
    service: productpage
spec:
  ports:
    - port: 9080
      name: http
  selector:
    app: productpage
---
apiVersion: v1
kind: ServiceAccount
metadata:
  name: bookinfo-productpage
  namespace: bookinfo
  labels:
    account: productpage
---
apiVersion: apps/v1
kind: Deployment
metadata:
  name: productpage-v1
  namespace: bookinfo
  labels:
    app: productpage
    version: v1
spec:
  replicas: 1
  selector:
    matchLabels:
      app: productpage
      version: v1
  template:
    metadata:
      labels:
        app: productpage
        version: v1
    spec:
      serviceAccountName: bookinfo-productpage
      containers:
        - name: productpage
          image: docker.io/istio/examples-bookinfo-productpage-v1:1.16.4
          imagePullPolicy: IfNotPresent
          ports:
            - containerPort: 9080
          volumeMounts:
            - name: tmp
              mountPath: /tmp
          securityContext:
            runAsUser: 1000
      volumes:
        - name: tmp
          emptyDir: {}

デプロイするとhttp://localhost:8091にアクセスして、動作確認できます。

alt text

etcdクラスタ

シンプルなetcdクラスタをKubernetes上に構築します。etcdクライアントのメッシュ通信なので、DNS通信が確認できます。

# デプロイ
$ kubectl apply -f ./etcd.yaml

# 動作確認
$ kubectl get po -n etcd
NAME     READY   STATUS    RESTARTS   AGE
etcd-0   0/1     Pending   0          2m8s
etcd-1   0/1     Pending   0          2m8s
etcd-2   0/1     Pending   0          2m8s

# 削除
$ kubectl delete -f ./etcd.yaml

クリックでetcd.yamlの定義を見る

# kubectl apply -f ./etcd.yaml
# kubectl delete -f ./etcd.yaml
apiVersion: v1
kind: Namespace
metadata:
  name: etcd
---
apiVersion: v1
kind: Service
metadata:
  name: etcd
  namespace: etcd
spec:
  type: ClusterIP
  clusterIP: None
  selector:
    app: etcd
  ##
  ## Ideally we would use SRV records to do peer discovery for initialization.
  ## Unfortunately discovery will not work without logic to wait for these to
  ## populate in the container. This problem is relatively easy to overcome by
  ## making changes to prevent the etcd process from starting until the records
  ## have populated. The documentation on statefulsets briefly talk about it.
  ##   https://kubernetes.io/docs/concepts/workloads/controllers/statefulset/#stable-network-id
  publishNotReadyAddresses: true
  ##
  ## The naming scheme of the client and server ports match the scheme that etcd
  ## uses when doing discovery with SRV records.
  ports:
    - name: etcd-client
      port: 2379
    - name: etcd-server
      port: 2380
    - name: etcd-metrics
      port: 8080
---
apiVersion: apps/v1
kind: StatefulSet
metadata:
  namespace: etcd
  name: etcd
spec:
  ##
  ## The service name is being set to leverage the service headlessly.
  ## https://kubernetes.io/docs/concepts/services-networking/service/#headless-services
  serviceName: etcd
  ##
  ## If you are increasing the replica count of an existing cluster, you should
  ## also update the --initial-cluster-state flag as noted further down in the
  ## container configuration.
  replicas: 3
  ##
  ## For initialization, the etcd pods must be available to eachother before
  ## they are "ready" for traffic. The "Parallel" policy makes this possible.
  podManagementPolicy: Parallel
  ##
  ## To ensure availability of the etcd cluster, the rolling update strategy
  ## is used. For availability, there must be at least 51% of the etcd nodes
  ## online at any given time.
  updateStrategy:
    type: RollingUpdate
  ##
  ## This is label query over pods that should match the replica count.
  ## It must match the pod template's labels. For more information, see the
  ## following documentation:
  ##   https://kubernetes.io/docs/concepts/overview/working-with-objects/labels/#label-selectors
  selector:
    matchLabels:
      app: etcd
  ##
  ## Pod configuration template.
  template:
    metadata:
      ##
      ## The labeling here is tied to the "matchLabels" of this StatefulSet and
      ## "affinity" configuration of the pod that will be created.
      ##
      ## This example's labeling scheme is fine for one etcd cluster per
      ## namespace, but should you desire multiple clusters per namespace, you
      ## will need to update the labeling schema to be unique per etcd cluster.
      labels:
        app: etcd
      annotations:
        ##
        ## This gets referenced in the etcd container's configuration as part of
        ## the DNS name. It must match the service name created for the etcd
        ## cluster. The choice to place it in an annotation instead of the env
        ## settings is because there should only be 1 service per etcd cluster.
        serviceName: etcd
    spec:
      ##
      ## Configuring the node affinity is necessary to prevent etcd servers from
      ## ending up on the same hardware together.
      ##
      ## See the scheduling documentation for more information about this:
      ##   https://kubernetes.io/docs/concepts/scheduling-eviction/assign-pod-node/#node-affinity
      affinity:
        ## The podAntiAffinity is a set of rules for scheduling that describe
        ## when NOT to place a pod from this StatefulSet on a node.
        podAntiAffinity:
          ##
          ## When preparing to place the pod on a node, the scheduler will check
          ## for other pods matching the rules described by the labelSelector
          ## separated by the chosen topology key.
          requiredDuringSchedulingIgnoredDuringExecution:
            ## This label selector is looking for app=etcd
            - labelSelector:
                matchExpressions:
                  - key: app
                    operator: In
                    values:
                      - etcd
              ## This topology key denotes a common label used on nodes in the
              ## cluster. The podAntiAffinity configuration essentially states
              ## that if another pod has a label of app=etcd on the node, the
              ## scheduler should not place another pod on the node.
              ##   https://kubernetes.io/docs/reference/labels-annotations-taints/#kubernetesiohostname
              topologyKey: "kubernetes.io/hostname"
      ##
      ## Containers in the pod
      containers:
        ## This example only has this etcd container.
        - name: etcd
          image: quay.io/coreos/etcd:v3.5.21
          imagePullPolicy: IfNotPresent
          ports:
            - name: etcd-client
              containerPort: 2379
            - name: etcd-server
              containerPort: 2380
            - name: etcd-metrics
              containerPort: 8080
          ##
          ## These probes will fail over TLS for self-signed certificates, so etcd
          ## is configured to deliver metrics over port 8080 further down.
          ##
          ## As mentioned in the "Monitoring etcd" page, /readyz and /livez were
          ## added in v3.5.12. Prior to this, monitoring required extra tooling
          ## inside the container to make these probes work.
          ##
          ## The values in this readiness probe should be further validated, it
          ## is only an example configuration.
          readinessProbe:
            httpGet:
              path: /readyz
              port: 8080
            initialDelaySeconds: 10
            periodSeconds: 5
            timeoutSeconds: 5
            successThreshold: 1
            failureThreshold: 30
          ## The values in this liveness probe should be further validated, it
          ## is only an example configuration.
          livenessProbe:
            httpGet:
              path: /livez
              port: 8080
            initialDelaySeconds: 15
            periodSeconds: 10
            timeoutSeconds: 5
            failureThreshold: 3
          env:
            ##
            ## Environment variables defined here can be used by other parts of the
            ## container configuration. They are interpreted by Kubernetes, instead
            ## of in the container environment.
            ##
            ## These env vars pass along information about the pod.
            - name: K8S_NAMESPACE
              valueFrom:
                fieldRef:
                  fieldPath: metadata.namespace
            - name: HOSTNAME
              valueFrom:
                fieldRef:
                  fieldPath: metadata.name
            - name: SERVICE_NAME
              valueFrom:
                fieldRef:
                  fieldPath: metadata.annotations['serviceName']
            ##
            ## Configuring etcdctl inside the container to connect to the etcd node
            ## in the container reduces confusion when debugging.
            - name: ETCDCTL_ENDPOINTS
              value: $(HOSTNAME).$(SERVICE_NAME):2379
            ##
            ## TLS client configuration for etcdctl in the container.
            ## These files paths are part of the "etcd-client-certs" volume mount.
            # - name: ETCDCTL_KEY
            #   value: /etc/etcd/certs/client/tls.key
            # - name: ETCDCTL_CERT
            #   value: /etc/etcd/certs/client/tls.crt
            # - name: ETCDCTL_CACERT
            #   value: /etc/etcd/certs/client/ca.crt
            ##
            ## Use this URI_SCHEME value for non-TLS clusters.
            - name: URI_SCHEME
              value: "http"
          ## TLS: Use this URI_SCHEME for TLS clusters.
          # - name: URI_SCHEME
          # value: "https"
          ##
          ## If you're using a different container, the executable may be in a
          ## different location. This example uses the full path to help remove
          ## ambiguity to you, the reader.
          ## Often you can just use "etcd" instead of "/usr/local/bin/etcd" and it
          ## will work because the $PATH includes a directory containing "etcd".
          command:
            - /usr/local/bin/etcd
          ##
          ## Arguments used with the etcd command inside the container.
          args:
            ##
            ## Configure the name of the etcd server.
            - --name=$(HOSTNAME)
            ##
            ## Configure etcd to use the persistent storage configured below.
            - --data-dir=/data
            ##
            ## In this example we're consolidating the WAL into sharing space with
            ## the data directory. This is not ideal in production environments and
            ## should be placed in it's own volume.
            - --wal-dir=/data/wal
            ##
            ## URL configurations are parameterized here and you shouldn't need to
            ## do anything with these.
            - --listen-peer-urls=$(URI_SCHEME)://0.0.0.0:2380
            - --listen-client-urls=$(URI_SCHEME)://0.0.0.0:2379
            - --advertise-client-urls=$(URI_SCHEME)://$(HOSTNAME).$(SERVICE_NAME):2379
            ##
            ## This must be set to "new" for initial cluster bootstrapping. To scale
            ## the cluster up, this should be changed to "existing" when the replica
            ## count is increased. If set incorrectly, etcd makes an attempt to
            ## start but fail safely.
            - --initial-cluster-state=new
            ##
            ## Token used for cluster initialization. The recommendation for this is
            ## to use a unique token for every cluster. This example parameterized
            ## to be unique to the namespace, but if you are deploying multiple etcd
            ## clusters in the same namespace, you should do something extra to
            ## ensure uniqueness amongst clusters.
            - --initial-cluster-token=etcd-$(K8S_NAMESPACE)
            ##
            ## The initial cluster flag needs to be updated to match the number of
            ## replicas configured. When combined, these are a little hard to read.
            ## Here is what a single parameterized peer looks like:
            ##   etcd-0=$(URI_SCHEME)://etcd-0.$(SERVICE_NAME):2380
            - --initial-cluster=etcd-0=$(URI_SCHEME)://etcd-0.$(SERVICE_NAME):2380,etcd-1=$(URI_SCHEME)://etcd-1.$(SERVICE_NAME):2380,etcd-2=$(URI_SCHEME)://etcd-2.$(SERVICE_NAME):2380
            ##
            ## The peer urls flag should be fine as-is.
            - --initial-advertise-peer-urls=$(URI_SCHEME)://$(HOSTNAME).$(SERVICE_NAME):2380
            ##
            ## This avoids probe failure if you opt to configure TLS.
            - --listen-metrics-urls=http://0.0.0.0:8080
          ##
          ## These are some configurations you may want to consider enabling, but
          ## should look into further to identify what settings are best for you.
          # - --auto-compaction-mode=periodic
          # - --auto-compaction-retention=10m
          ##
          ## TLS client configuration for etcd, reusing the etcdctl env vars.
          # - --client-cert-auth
          # - --trusted-ca-file=$(ETCDCTL_CACERT)
          # - --cert-file=$(ETCDCTL_CERT)
          # - --key-file=$(ETCDCTL_KEY)
          ##
          ## TLS server configuration for etcdctl in the container.
          ## These files paths are part of the "etcd-server-certs" volume mount.
          # - --peer-client-cert-auth
          # - --peer-trusted-ca-file=/etc/etcd/certs/server/ca.crt
          # - --peer-cert-file=/etc/etcd/certs/server/tls.crt
          # - --peer-key-file=/etc/etcd/certs/server/tls.key
          ##
          ## This is the mount configuration.
          volumeMounts:
            - name: etcd-data
              mountPath: /data
          ##
          ## TLS client configuration for etcdctl
          # - name: etcd-client-tls
          #   mountPath: "/etc/etcd/certs/client"
          #   readOnly: true
          ##
          ## TLS server configuration
          # - name: etcd-server-tls
          #   mountPath: "/etc/etcd/certs/server"
          #   readOnly: true
      volumes:
      ##
      ## TLS client configuration
      # - name: etcd-client-tls
      #   secret:
      #     secretName: etcd-client-tls
      #     optional: false
      ##
      ## TLS server configuration
      # - name: etcd-server-tls
      #   secret:
      #     secretName: etcd-server-tls
      #     optional: false
  ##
  ## This StatefulSet will uses the volumeClaimTemplate field to create a PVC in
  ## the cluster for each replica. These PVCs can not be easily resized later.
  volumeClaimTemplates:
    - metadata:
        name: etcd-data
      spec:
        accessModes: ["ReadWriteOnce"]
        ##
        ## In some clusters, it is necessary to explicitly set the storage class.
        ## This example will end up using the default storage class.
        storageClassName: "etcd-sc"
        resources:
          requests:
            storage: 1Gi
---
apiVersion: storage.k8s.io/v1
kind: StorageClass
metadata:
  name: etcd-sc
  annotations:
    storageclass.kubernetes.io/is-default-class: "true"
provisioner: ebs.csi.eks.amazonaws.com
volumeBindingMode: WaitForFirstConsumer
parameters:
  type: gp3
  encrypted: "true"

Kubesharkでトラフィックを確認する

KubesharkのダッシュボードでAPI CALLSから通信を確認します。そのままの状態だとトラフィックがダダ流れです。ぼんやり見るにはいいでしょう。

alt text

全量トラフィックのサービスマップは時々見たくなります。

alt text

ノイズなトラフィックはクエリでフィルタリングできます。どのようなフィルタができるかは、クエリの右端にあるハンバーガーメニューからなんとなくわかります。

alt text

あるいは、今あるトラフィックにマウスホバーするとフィルタに追加するかポップアップができます。

alt text

alt text

ポチポチクリックしてから、Applyを推すとその内容でフィルタされます。便利。

node.name == "i-028d42e8587e84db7" and dst.ip == "127.0.0.1"and dst.port == "8080"

alt text

ヘルスチェックを除外する

Kubernetesあるあるなのが、Podのヘルスチェックトラフィックです。これがあるとノイズになるので、除外しましょう。多くの場合、/healthz/healthにアクセスしているので、これらを除外します。ついでにdnsやerrorも除外します。これだけで、実際のトラフィックが見やすくなります。

!dns and !error and request.path != "/health" and request.path != "/healthz"

alt text

ネームスペースを絞り込む

Guestbookはguestbook、Bookinfoはbookinfo、etcdはetcdネームスペースにデプロイしました。これらに絞り込むとさらに見やすくなります。

!dns and !error and src.namespace == "bookinfo"

alt text

GETリクエストの例

bookinfoのGETリクエストの例です。/details/0にリクエストして、レスポンスがJSONで返ってきているのがわかります。

{"id":0,"author":"William Shakespeare","year":1595,"type":"paperback","pages":200,"publisher":"PublisherA","language":"English","ISBN-10":"1234567890","ISBN-13":"123-1234567890"}
Request Response
alt text alt text

この時のサービスマップはパスも表示されていてすごいです。

alt text

DNSトラフィックやエラーを除外する

アプリケーションのトラフィックを見たい場合、DNSトラフィックやエラーはノイズになることが多いです。これらを除外しましょう。これはデフォルトのクエリでもあります。

!dns and !error

DNSトラフィックを確認する

DNSトラフィックを確認するには、dnsをクエリに追加します。サーバー間通信で接続先が解決できないっていうときに絶大な効果を発揮します。

dns

alt text

Request Response
alt text alt text

サービスマップで、このDNSトラフィックを確認できます。

alt text

Redisトラフィックを確認する

Redisトラフィックを確認するには、redisをクエリに追加します。Guestbookアプリケーションのバックエンドで使われているので、これを使うとGuestbookアプリケーションの通信に絞り込めます。

redis and src.namespace == "guestbook"

alt text

Request Response
alt text alt text

ステータスコード404に絞り込む

レスポンスステータスコードが404の通信に絞りこむことも簡単です。

!dns and request.path != "/health" and request.path != "/healthz" and response.status == 404

alt text

まとめ

価格や影響を考えると本番で常時使うというより、開発環境や再現環境で使うのが手始めにはよい感じです。少なくとも、Kubernetes内部で流れているトラフィックを見る手段はかなり簡便に導入、利用できるのは確かです。

ぜひお試しください。

参考情報


  1. Artifact Hubにはhelm repo add kubeshark https://helm.kubeshark.coとなっていますが、現状DNSトラブルでアクセスできないため、公式GitHubのREADMEにあるhttps://helm.kubehq.com/を使います。また、DNSトラブルの影響か最新チャートでは起動時のライセンスチェックにこけてkubeshark-hubがうまく起動できないため、--version 52.3.92を指定することで安定起動できます。
  2. DNSトラブルがあるとうまく初期画面が表示されませんが、ワークロードいれたりちょっと待つと表示されます
  3. https://raw.githubusercontent.com/istio/istio/release-1.14/samples/bookinfo/platform/kube/bookinfo.yamlから取得したものをベースにしています

.NET 10のファイルベースプログラムをパイプ入力やGitHub Actionsで使う

以前にも軽く紹介する記事を書いているのですが、.NET 10から、C#のファイルベースプログラム実行機能が追加されました。C#にファイルベースプログラムが来ても.csファイルを用意して実行することを考えがちでしたが、そういえばパイプ入力でコードを渡して実行できます。例えば、次のようなコマンドが実行できます。

# BashやPowerShellで実行できる
$ echo 'Console.WriteLine("FooBar");' | dotnet run -
FooBar

いい感じに見えますね。これまでC#はコンパイルが必要でスクリプト的な使い心地を得にくかったのですが、これを使うといい感じの使い勝手になっています。 今回はこの機能の活用例を紹介します。

コンパイルを意識せず実行できる

C#はコンパイルが必要なため、スクリプト言語のような気軽さがありませんでした。.csxという選択肢もありますが、標準C#との記法の違いや、デバッグしにくさ、dotnet SDKだけでは実行できない点が課題でした。しかし、.NET 10のファイルベースプログラムならdotnet SDKだけで実行可能で、パイプライン入力を使ってファイルがなくても実行できます。実行時に明示的なビルドも不要で、ファイルサイズが大きくなりにくいためコンパイルを意識せず、それでいてコンパイルによる安全性も担保されます。

$ echo 'int x = "string";' | dotnet run -
C:\Users\guitarrapc\AppData\Local\Temp\dotnet\runfile\1ohbfytn.dex\app.cs(1,9): error CS0029: Cannot implicitly convert type 'string' to 'int'

The build failed. Fix the build errors and run again.

型エラーや構文エラーがあれば実行前に検出できるというのは、かなり安心感があります。スクリプト的な使い心地とコンパイル言語の安全性を両立できるのが強みです。

パイプ入力を使ってちょっとした処理を実行する

ちょっと1-10でランダムな順番の数列を生成したいときは、Enumerable.Range(1,10).Shuffle()で簡単に実行できます。

$ echo 'Console.WriteLine(string.Join(",", Enumerable.Range(1,10).Shuffle()));' | dotnet run -
9,3,1,8,10,4,5,2,7,6

Webページの最初の10行を取得したいときは、HttpClientを使って簡単に実行できます。複数行コードもパイプで渡せるので、いわゆるPythonやBashスクリプトのように使えます。かき捨てですばやく実行したいときに便利です。

$ cat <<EOF | dotnet run -
using System.Net.Http;
var client = new HttpClient();
var res = await client.GetStringAsync("https://tech.guitarrapc.com");
var first10 = res.Split("\n").Take(10);
Console.WriteLine(string.Join("\n", first10));
EOF
<!DOCTYPE html>
<html
  lang="ja"

data-admin-domain="//blog.hatena.ne.jp"
data-admin-origin="https://blog.hatena.ne.jp"
data-author="guitarrapc_tech"
data-avail-langs="ja en"
data-blog="guitarrapc-tech.hatenablog.com"
data-blog-host="guitarrapc-tech.hatenablog.com"

GitHub Actionsでスクリプト代わりに実行する

スクリプト的な書き捨ては、GitHub ActionsのワークフローYAMLで実行するときに便利です。賛否あるものの、GitHub Actionsでちょっとした処理を実行したいときにBash/Python/Rubyスクリプトをインラインで書くことがあります。ただ、少し規模が大きくなるなら、ファイルに保存すると管理しやすくなります。

RubyスクリプトとC#のファイルベースプログラムで同じことを実現する例を紹介します。hadashiA/VContainer | GitHubは、GitHub ActionsワークフローでRubyスクリプトを使ってファイルのバージョンを更新しています。

jobs:
  update-version-number:
    steps:
      - name: Update version number ${{ steps.configure.outputs.git-tag }}
        run: |
          ruby .github/update_version_number.rb ${{ steps.configure.outputs.git-tag }}

Rubyの中身は次のようになっています。シンプルでいいです。

V = ARGV[0]
working_dir = File.expand_path(File.dirname(File.dirname(__FILE__)))

def replace_install_url(src)
  src.gsub(
    %r{(https://github.com/hadashiA/VContainer.git\?path=VContainer/Assets/VContainer#)[\d\.]+},
    %Q{\\1#{V}}
  )
end

def replace_package_json(src)
  src.gsub(
    /"version"\s*:\s*"([\d\.]+)"/,
    %Q{"version": "#{V}"})
end

def replace_docusaurus_config(src)
  src.gsub(
    /label\s*:\s*['"]v?[\d\.]+['"]/,
    %Q{'label': 'v#{V}'})
end

{
  replace_package_json: ["VContainer/Assets/VContainer/package.json"],
  replace_install_url: ["README.md", "website/docs/getting-started/installation.mdx", "website/i18n/ja/docusaurus-plugin-content-docs/current/getting-started/installation.mdx"],
  replace_docusaurus_config: ["website/docusaurus.config.ts"]
}.each do |method, relative_paths|
  relative_paths.each do |relative_path|
    path = File.join(working_dir, relative_path)
    src = File.read path
    dst = send(method, src)
    File.write path, dst
  end
end

C#のファイルベースプログラムも、これと近い雰囲気で書くことができます。C#版を見るとRuby版と良く似ているのが分かるでしょう。ここまで書き心地が近いなら、好みの言語を選びやすくなります。1

using System.Text.RegularExpressions;
var v = args[0];
var workingDir = Path.GetDirectoryName(Directory.GetCurrentDirectory())!;

string ReplaceInstallUrl(string src) => Regex.Replace(
    src,
    @"(https://github.com/hadashiA/VContainer.git\?path=VContainer/Assets/VContainer#)[\d\.]+",
    m => $"{m.Groups[1].Value}{v}"
);

string ReplacePackageJson(string src) => Regex.Replace(
    src,
    "\"version\"\\s*:\\s*\"[\\d\\.]+\"",
    $"\"version\": \"{v}\""
);

string ReplaceDocusaurusConfig(string src) => Regex.Replace(
    src,
    @"label\s*:\s*['""]v?[\d\.]+['""]",
    $"'label': 'v{v}'"
);

var jobs = new (Func<string, string> Replacer, string[] RelativePaths)[]
{
    (ReplacePackageJson,["VContainer/Assets/VContainer/package.json"]),
    (ReplaceInstallUrl,["README.md", "website/docs/getting-started/installation.mdx", "website/i18n/ja/docusaurus-plugin-content-docs/current/getting-started/installation.mdx"]),
    (ReplaceDocusaurusConfig,["website/docusaurus.config.ts"]),
};

foreach (var (replacer, relativePaths) in jobs)
{
    foreach (var relativePath in relativePaths)
    {
        var path = Path.Combine(workingDir, relativePath);
        if (!File.Exists(path))
        {
            Console.Error.WriteLine($"Skip (not found): {path}");
            continue;
        }
        var src = File.ReadAllText(path);
        var dst = replacer(src);
        if (src.Equals(dst, StringComparison.Ordinal))
        {
            Console.WriteLine($"No changes: {path}");
            continue;
        }
        File.WriteAllText(path, dst);
        Console.WriteLine($"Updated: {path}");
    }
}

GitHub Actionsワークフローも、Rubyとほぼ同様の呼び出し方でC#コードを実行できます。

jobs:
  update-version-number:
    steps:
      - name: Update version number ${{ steps.configure.outputs.git-tag }}
        run: |
          dotnet run .github/update_version_number.cs -- ${{ steps.configure.outputs.git-tag }}

実行すると次のようなログが出ます。

$ dotnet run .github/update_version_number.cs -- 1.1.1
Updated: VContainer-master/VContainer-master/VContainer/Assets/VContainer/package.json
Updated: VContainer-master/VContainer-master/README.md
Updated: VContainer-master/VContainer-master/website/docs/getting-started/installation.mdx
Updated: VContainer-master/VContainer-master/website/i18n/ja/docusaurus-plugin-content-docs/current/getting-started/installation.mdx
No changes: VContainer-master/VContainer-master/website/docusaurus.config.ts

色々な使い方

ちょっと使いたくなった時に、どうしようってなることの使い方例をメモです。

プロセス実行を簡単にする

C#はプロセス実行が煩雑なコードになりやすいのですが、Cysharp/ProcessXのZxを使うと簡単に書けます。GitHub Actionsでちょっとした処理を実行したいときに便利です。

#:package Cysharp.ProcessX@1.5.6
using Zx;
await "cat package.json | grep name";

JSONやYAMLの取り扱い

JSONの取り扱いも、System.Text.Jsonとレコード型を使うと簡単でしょう。ファイルベースプログラムはデフォルトNativeAOTでビルドされるため、JSONシリアライズのコンテキストを用意しておく必要があります。2

using System.Text.Json;
using System.Text.Json.Serialization;

var user = JsonSerializer.Deserialize<User>(File.ReadAllText("user.json"), AppContext.Default.User);
Console.WriteLine(user);

// 読み込み専用
record User(string Name, int Age);

[JsonSerializable(typeof(User))]
internal partial class AppContext : JsonSerializerContext { }

レコードクラスは書き換え不可なinit Onlyプロパティを持つため書き換えるには、自前でプロパティを用意します。

using System.Text.Json;
using System.Text.Json.Serialization;

var user = JsonSerializer.Deserialize<User>(File.ReadAllText("user.json"), AppContext.Default.User);
Console.WriteLine(user);

user.Name = "NewName";
File.WriteAllText("user2.json", JsonSerializer.Serialize(user, AppContext.Default.User));

Console.WriteLine(user);

// 書き込み可能
record User
{
    public string Name { get; set; } = "";
    public int Age { get; set; }
}

[JsonSerializable(typeof(User))]
internal partial class AppContext : JsonSerializerContext { }

Pythonと違って標準ライブラリにYAMLがないのですが、hadashiA/VYamlaaubry/YamlDotNetを使うとYAMLも簡単に扱えます。

まとめ

あまり頻繁には使わないでしょうが、ちょっとしたスクリプト的な処理を実行したいときに便利です。特に以下のようなケースで便利に使えます。

  • GitHub Actionsでちょっとした処理を実行したい
  • ワンライナーで簡単な処理を試したい

.NET 10 SDKがあればすぐに使えるので、ぜひ試してみてください。


  1. これはClaudeに指示をして、RubyをベースにC#版を書かせてから軽く調整していますが、ほぼ手間がかかっていません。
  2. ファイルベースプログラムはデフォルトでNativeAOTビルドされるため、起動が高速です。ただし、JSONシリアライズではソースジェネレーターを使ったコンテキストの用意が必要になります。NativeAOTを無効にするのも手ですが、起動速度が犠牲になるため注意してください。